
How Low Temperatures Affect Your Property

The Science Behind Winter Water Damage: How Low Temperatures Affect Your Property
How low temperatures affect your property.
Picture this: it’s a frosty January morning in southeastern Wisconsin. The snow blankets your yard, icicles hang from the eaves, and the air is crisp with the promise of another cold day. Inside your cozy home, the furnace hums, and everything seems peaceful. But beneath this serene winter landscape, there could be hidden dangers lurking in your pipes and foundation. These are dangers that could cost thousands in repairs if left unchecked.
Winter brings more than just chilly temperatures and snow; it introduces a set of unique challenges for homeowners, particularly concerning water damage. The science behind this phenomenon is straightforward yet often overlooked: low temperatures can wreak havoc on your property by causing water to freeze, expand, and damage your home in ways that may not be immediately visible. Understanding how these low temperatures affect your property can help you take the necessary steps to prevent costly damage and maintain the integrity of your home throughout the cold season.

Freezing Water and Expanding Pipes
Water is one of the few substances that expands when it freezes, it’s a quirky trait of its molecular structure. As temperatures drop, water inside your pipes can freeze, increasing in volume and exerting immense pressure on the pipe walls. This expansion can cause pipes to crack or even burst, leading to significant water damage once the ice melts and water starts flowing again.
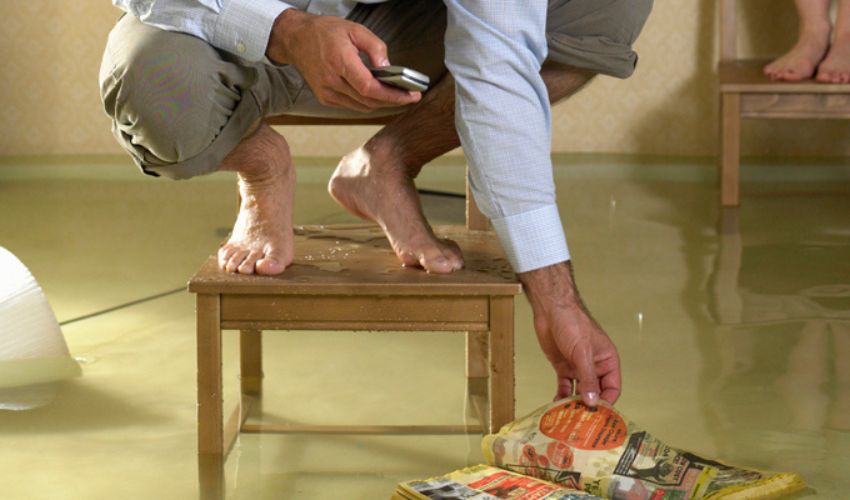
Let me share a story from last winter. A homeowner in Sheboygan County, let’s call him Mike, noticed a strange sound coming from his kitchen one evening, a faint popping noise, almost like distant fireworks. Ignoring it, he went to bed, thinking nothing of it. The next morning, Mike woke up to a kitchen floor covered in water. A pipe in the wall had burst overnight due to the freezing temperatures, flooding his kitchen and damaging his floors and cabinets.
Preventing Frozen Pipes
This is a common scenario during the harsh Wisconsin winters, and it all boils down to the science of freezing water. The pressure from the expanding ice can be likened to a balloon being over-inflated. Eventually, something has to give, and in this case, it’s often the pipe walls.
Understanding this scientific principle is crucial for preventing similar incidents. By insulating exposed pipes, especially those in unheated areas like basements or attics, you can reduce the risk of freezing. It’s also wise to keep a trickle of water flowing during extremely cold nights, as moving water is less likely to freeze.
Let me share a story from last winter. A homeowner in Sheboygan County, let’s call him Mike, noticed a strange sound coming from his kitchen one evening, a faint popping noise, almost like distant fireworks. Ignoring it, he went to bed, thinking nothing of it. The next morning, Mike woke up to a kitchen floor covered in water. A pipe in the wall had burst overnight due to the freezing temperatures, flooding his kitchen and damaging his floors and cabinets.

How Low Temperatures Affect Your Property Building Materials
Winter’s freezing temperatures don’t just threaten your pipes; they can also have a profound impact on the very materials that make up your home. Materials like wood and concrete, which are integral to your home’s structure, are not immune to the effects of the cold.
Imagine the wooden beams of your home as a seasoned Wisconsinite. Just as our bodies react to the cold by contracting and shivering, wood and concrete react similarly. When temperatures drop, these materials contract, and when temperatures rise again, they expand. This repeated expansion and contraction, known as the freeze-thaw cycle, can lead to cracks and weaken the structural integrity of your home over time.
Real-Life Damage from the Freeze-Thaw Cycle
Take, for example, Jane from Ozaukee County, who discovered cracks in her foundation after a particularly harsh winter. At first, she thought the small cracks were simply cosmetic, a natural aging of her home. But by spring, those small cracks had widened, allowing water to seep in during the thaw. What started as a minor issue quickly escalated into a significant water damage problem in her basement.
The freeze-thaw cycle can be especially damaging to concrete foundations, sidewalks, and driveways. As water seeps into tiny cracks and freezes, it expands, forcing the cracks to widen. Over time, this can lead to substantial damage, potentially compromising the stability of your home.
Homeowners can mitigate these risks by sealing any visible cracks before winter sets in and ensuring proper drainage around their home to prevent water accumulation. Regular inspections and maintenance are crucial in catching these issues early, preventing minor cracks from becoming major problems.
Imagine the wooden beams of your home as a seasoned Wisconsinite. Just as our bodies react to the cold by contracting and shivering, wood and concrete react similarly. When temperatures drop, these materials contract, and when temperatures rise again, they expand. This repeated expansion and contraction, known as the freeze-thaw cycle, can lead to cracks and weaken the structural integrity of your home over time.

The Role of Ice Dams in Roof Damage
As picturesque as a snow-covered roof may seem, it can conceal a serious threat: ice dams. Another issues with low temperatures affecting your property are ridges of ice that form at the edge of a roof and prevent melting snow from draining off. The water that backs up behind the dam can leak into your home, causing significant water damage.
Consider Bob and Linda, a couple from Washington County, who loved the charm of their snow-laden roof during the holidays. But that charm quickly faded when they noticed water stains spreading across their ceiling. What they didn’t realize was that an ice dam had formed, trapping melted snow and allowing water to seep under their roof shingles.
Ice dams occur when the heat from your home rises to the roof, melting the snow. As the water trickles down, it hits the colder edge of the roof, refreezing and forming a dam. This process is exacerbated by poor insulation and ventilation, which allows more heat to escape and speeds up the melting process.
Preventing ice dams involves ensuring your attic is well-insulated and ventilated, keeping the roof temperature consistent and preventing the snow from melting unevenly. Simple measures like using a roof rake to remove snow buildup and installing heating cables can also help mitigate this risk.
By understanding and addressing the factors that contribute to ice dam formation, homeowners can protect their roofs and avoid the costly repairs that come with water damage. If you’re experiencing any issues you can also contact a local roofer to evaluate the conditions such as Smart Roofing.

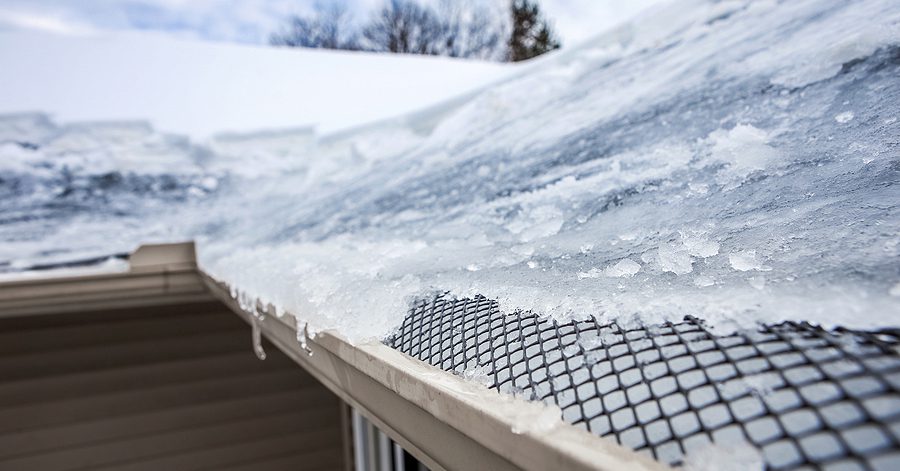
Frozen Gutters and Downspouts
Another sneaky culprit of winter water damage is frozen gutters and downspouts. While they may seem like minor components of your home’s exterior, when clogged or frozen, they can lead to major issues.
Let’s revisit another scenario from a harsh Wisconsin winter. Susan, a homeowner in Washington County, noticed that her gutters were overflowing every time there was a slight thaw. What she didn’t realize was that her gutters were filled with ice, blocking proper drainage. The water had nowhere to go and started seeping into her home’s walls, causing water stains and even mold growth in her living room.
Frozen gutters and downspouts occur when leaves and debris block the flow of water. When the temperatures drop, this trapped water freezes, creating blockages that prevent proper drainage. As the ice expands, it can cause the gutters to pull away from the house or even break entirely.
The key to preventing this issue is regular maintenance. Homeowners should clear their gutters of debris before winter and consider installing gutter guards to keep leaves out. Additionally, ensuring that downspouts are free of obstructions and extend far enough from the house will help direct water away from the foundation, reducing the risk of water damage.
By staying vigilant and proactive, homeowners can protect their homes from the cascading effects of frozen gutters, safeguarding both their property and their peace of mind during the winter months.
Conclusion
Winter in southeastern Wisconsin brings with it a unique set of challenges for homeowners, particularly when it comes to protecting your property from water damage caused by low temperatures. From the risk of frozen pipes to the structural strain on building materials, the formation of ice dams, and the hidden hazards of frozen gutters, the cold weather can have far-reaching impacts on your home.
To recap, understanding and addressing these key areas can make a significant difference:
- Frozen Pipes: The importance of insulating and maintaining your plumbing to prevent burst pipes and water damage.
- Impact on Building Materials: Recognizing how the freeze-thaw cycle can compromise your home’s structural integrity and taking steps to minimize its effects.
- Ice Dams: Ensuring proper insulation and ventilation to prevent ice dams, which can cause water to seep into your home.
- Frozen Gutters: Regularly cleaning and maintaining gutters and downspouts to ensure proper drainage and avoid water overflow and damage.
By conducting regular inspections and taking prompt action at the first sign of trouble, homeowners can mitigate these risks and protect their property from costly damage. Don’t wait until a minor issue becomes a major problem, prevention is the key to maintaining the integrity of your home.
Review Your Property During these Low Temperatures
As we face another cold and potentially harsh winter, take the time to monitor your home’s vulnerabilities. Whether it’s inspecting your gutters, adding insulation, or checking for signs of ice dams, proactive measures can save you time, money, and stress in the long run. And remember, if you encounter any significant issues or need expert advice, professional help is always available to guide you through the restoration process.
Protect your home, your family, and your peace of mind by staying vigilant this winter. Keep an eye on those temperatures, and at the first sign of trouble, act quickly to safeguard your property against the perils of winter water damage.
And remember, prevention is your best defense. Whether it’s insulating your attic, clearing your gutters, or scheduling a roof inspection, small steps now can save you from big problems later.
Don’t wait until the next storm hits, start protecting your home today and enjoy the peace of mind that comes with being prepared.
For expert water damage restoration services that prioritize your satisfaction and peace of mind, trust Harrison’s Cleanup & Restoration. Contact us today if you’re experiencing any of the issues we mentioned. We have the remedies tailored for your needs.


Recent Comments