Winter Storm’s Water Leak

Winter Storm’s Water Leak

Winter Storm Water Leaks

Winter Storm Water Leaks: What to Do When Water Leaks Into Your Ceiling

Come December, the weather becomes dreary with freezing rain, frigid temperatures, and unwelcome signs of cold dark days. Last on your Christmas list are winter storm water leaks in the house. Imagine this: you wake up on a frosty Wisconsin morning after a night of howling winds and relentless snowfall. The sunlight filters through your windows, and as you sip your first coffee, you notice it, a dark, damp spot on your living room ceiling. A slow, steady drip follows, accompanied by the unmistakable musty smell of water seeping where it shouldn’t. Panic sets in. What do you do next?

For homeowners in Wisconsin, winter storms can turn picturesque snow-covered roofs into ticking time bombs. When melting snow, freezing rain, or an ice dam causes water to leak into your home, acting quickly can mean the difference between minor repairs and a major headache. Whether this is your first encounter with storm-related water damage or you’ve been here before, knowing the most cost-effective steps to take can save your home—and your wallet—from significant trouble.

This guide is here to walk you through exactly what to do when you spot a leak, who to call for help, and how to prevent future damage, all tailored to the unique challenges of Wisconsin winters. Let’s dive in.

Recognize the Signs of a Winter Storm’s Water Leak

When it comes to water leaks, identifying the problem early is half the battle. It’s a bit like spotting the first cracks in a frozen lake. What seems minor can quickly expand into something much more dangerous.

Common Signs to Watch For

A water leak after a storm doesn’t always announce itself with a dramatic gush of water. Often, it’s subtle at first:

  • A yellowish or brown stain spreading across your ceiling.
  • Paint or plaster bubbling or peeling in small patches.
  • A faint dripping sound when the house is otherwise silent.
  • A damp or musty smell in your attic or living space.

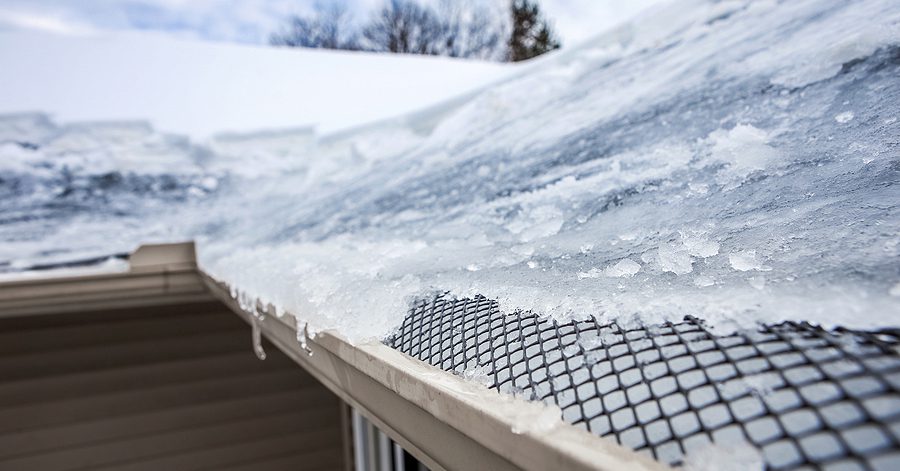
For Wisconsin homeowners, these signs can often be tied to issues like ice dams—those ridges of ice that form along the edge of your roof and trap melting snow behind them. When this trapped water has nowhere to go, it often seeps into your home through cracks or weak spots.

What If You Can’t Find the Source?

Sometimes, the source of the water isn’t obvious. In these cases:

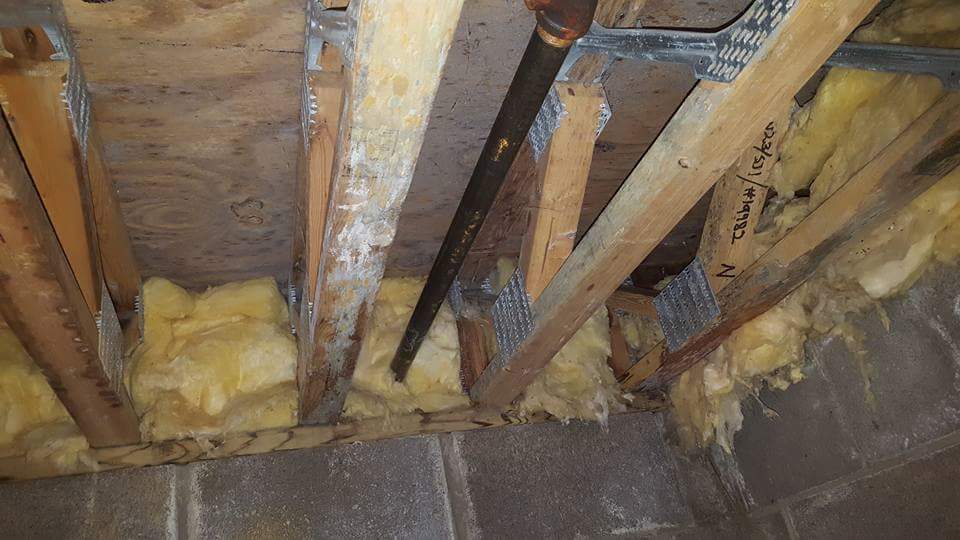
  1. Inspect your attic for wet insulation or visible drips.
  2. Check for ice dams or missing shingles on your roof.
  3. Use a flashlight to look for water trails along walls or ceilings.

Think of your home as a detective puzzle. Every sign is a clue, and finding the source of the leak is key to stopping further damage. If you’re unsure or can’t find the source, it’s time to call in a professional restoration company equipped to track down and address the issue.

Visual Guide

Winter Storm's Water Leak

By recognizing the signs early, you can prevent a small inconvenience from becoming a costly disaster. In the next section, we’ll walk you through immediate steps to minimize the damage once a leak has been spotted.

Immediate Steps to Minimize Damage

When a water leak strikes, time is your most valuable asset. Think of it like trying to catch a snowball rolling downhill. Act quickly, and you can stop it in its tracks. Wait too long, and it grows into an avalanche of costly repairs. Here’s what you should do immediately after spotting a leak.

1. Contain the Water

First things first: stop the damage from spreading.

  • Catch the Drip: Place a bucket, bowl, or any waterproof container under the leak to collect dripping water.
  • Protect Your Belongings: If water is pooling on furniture or the floor, move items out of harm’s way or cover them with plastic sheeting.
  • Cover the Source (If Accessible): If you can safely reach the area causing the leak, use a tarp or plastic wrap to temporarily seal it until help arrives.

Pro Tip: If the leak is close to electrical fixtures, shut off the power to that area to avoid a potential shock hazard.

2. Reduce Moisture Buildup

Water leaks often lead to excess moisture, which creates the perfect environment for mold growth.

  • Open windows (if temperatures allow) to improve ventilation.
  • Use fans or a dehumidifier to dry the area.
  • Absorb standing water with towels or a wet-dry vacuum.

A homeowner in Madison once avoided a full-blown mold infestation by simply running a dehumidifier in her attic the moment she noticed damp insulation after a storm. Quick action saved her thousands in cleanup costs.

3. Identify the Cause (If Safe)

Knowing where the water is coming from will help determine your next steps.

  • Check for obvious culprits, such as a broken shingle, clogged gutters, or an ice dam along the roof’s edge.
  • Look for less apparent issues, like cracks in the ceiling or water pooling on the attic floor.

Remember, Wisconsin winters add an extra layer of complexity. Ice dams, in particular, are a common culprit. If you notice a buildup of ice at the edge of your roof, it’s a strong indicator that melting snow is being forced under your shingles and into your home.

4. Call for Professional Help

At this stage, it’s time to decide whether the issue is manageable on your own or requires expert intervention.

  • When to DIY: Small leaks without structural damage may be manageable with basic tools and materials.
  • When to Call a Pro: If the leak is widespread, you suspect mold, or you can’t locate the source, it’s best to contact a water damage restoration company.

By taking these immediate steps, you’re already ahead of the game in protecting your home and keeping costs manageable. In the next section, we’ll explore how to find the right professionals and what questions to ask to ensure you get the best help possible.

Finding the Right Professional Help in Ozaukee and Washington Counties

Once you’ve contained the immediate damage, the next step is finding a reliable professional to assess and repair the issue. Winter water damage requires specialized expertise, and your choice of contractor can make or break the success of your restoration. Luckily, homeowners in Ozaukee and Washington Counties have access to skilled restoration services tailored to the challenges of Wisconsin winters.

1. Look for Local Expertise

When searching for a restoration company, prioritize those familiar with the unique weather patterns and building styles in Wisconsin. Companies based in Ozaukee and Washington Counties often have experience dealing with:

  • Ice dams and their impact on local roof designs.
  • Snowmelt issues in older homes common to the region.
  • High-humidity interiors caused by prolonged winter heating.

Example Companies: Check for local providers like Harrison’s Cleanup Restoration or Jordan’s Restoration, known for their fast response times during winter emergencies.

2. Ask the Right Questions

When contacting a restoration company, ensure they meet your needs by asking:

  • Do you have experience with ice dam-related leaks?
  • Can you provide references from other homeowners in Port Washington or Germantown?
  • Do you work directly with insurance companies? This can streamline the claims process.

3. Check for Certifications and Insurance

The best companies will be certified by organizations like the IICRC (Institute of Inspection, Cleaning, and Restoration Certification) and carry insurance to protect your property during repairs.

4. Get a Detailed Estimate

After inspecting the damage, a reliable contractor should provide a clear and detailed estimate, including:

  • The scope of work (e.g., water extraction, mold remediation, ceiling repairs).
  • Estimated costs and a timeline for completion.
  • Prevention recommendations, such as improving attic insulation or adding a roof heat cable.

By choosing a local expert, you’ll benefit from their understanding of the area’s specific challenges while supporting businesses within your community. In the next section, we’ll cover proactive measures to prevent winter water leaks in the first place.

Measures to Prevent Winter Storm’s Water Leaks

As the old saying goes, “An ounce of prevention is worth a pound of cure.” For homeowners in Ozaukee and Washington Counties, preparing your home before the winter storms hit can save you from the headache and cost of dealing with water damage later. Let’s look at some practical steps you can take to keep your home safe.

1. Prevent Ice Dams

Ice dams are one of the leading causes of winter water leaks in Wisconsin homes. By addressing the conditions that lead to their formation, you can significantly reduce your risk.
  • Improve Attic Insulation and Ventilation: Proper insulation keeps your roof at a consistent temperature, preventing snow from melting unevenly and refreezing at the edges. Consider working with local contractors who specialize in attic upgrades. Tip: Companies in Grafton or Port Washington often offer free assessments to check your insulation quality.
  • Install Roof Heat Cables: These electric cables help melt snow and ice in problem areas, such as roof valleys and gutters. For Washington County residents, reaching out to providers in West Bend can be a great start.
  • Clean Your Gutters Before Winter: Blocked gutters trap snow and ice, leading to dangerous backups. Schedule a cleaning service in fall to keep water flowing freely.

2. Monitor and Maintain Your Roof

Winter storms can expose weaknesses in your roof that might not be apparent during other seasons.

  • Schedule a Pre-Winter Roof Inspection: Have a professional examine your roof for loose shingles, cracks, or weak spots.
  • Trim Overhanging Branches: Heavy snow can cause tree limbs to break, potentially damaging your roof or creating new entry points for water.

3. Manage Interior Moisture

The warmth and humidity from indoor heating can exacerbate water damage if leaks occur.

  • Use a Dehumidifier in Key Areas: Particularly in attics and basements, where moisture tends to accumulate.
  • Keep an Eye on Humidity Levels: Aim to keep indoor humidity below 50% to prevent condensation on walls and ceilings.

4. Emergency Preparedness

Even with the best precautions, severe winter storms can overwhelm your defenses. Being prepared can help you act swiftly.

  • Have Essential Supplies Ready: Buckets, tarps, and a wet-dry vacuum can help contain damage until help arrives.
  • Keep Emergency Contacts Handy: Save the numbers of trusted local restoration companies in places.

By taking these proactive steps, you’ll not only protect your home from leaks but also improve its overall energy efficiency, saving you money on heating bills.

Conclusion

Wisconsin winters are beautiful but unforgiving, especially when it comes to protecting your home from storm-related water leaks. By recognizing the signs of a leak, acting quickly to minimize damage, and choosing the right professionals in Ozaukee and Washington Counties, you can navigate these challenges with confidence.

And remember, prevention is your best defense. Whether it’s insulating your attic, clearing your gutters, or scheduling a roof inspection, small steps now can save you from big problems later.

Don’t wait until the next storm hits, start protecting your home today and enjoy the peace of mind that comes with being prepared.

For expert water damage restoration services that prioritize your satisfaction and peace of mind, trust Harrison’s Cleanup & Restoration. Contact us today if you’re experiencing any of the issues we mentioned. We have the remedies tailored for your needs.

Preventing Frozen Pipes: Essential Tips to Avoid Water Damage and Mold This Winter

Preventing Frozen Pipes: Essential Tips to Avoid Water Damage and Mold This Winter

Preventing Frozen Pipes

Preventing Frozen Pipes: Essential Tips to Avoid Water Damage and Mold This Winter

As the winter months approach, homeowners need to be especially vigilant about protecting their homes from the cold. One of the most common and costly winter mishaps is frozen pipes. When temperatures drop, water in uninsulated or exposed pipes can freeze, causing them to expand and eventually burst. This can lead to significant water damage, disrupt your water supply, and create a perfect environment for mold growth. Preventing frozen pipes is critical to safeguarding your home and avoiding costly repairs.

In this blog post, we’ll cover practical strategies for preventing frozen pipes, including how to insulate pipes properly and methods for keeping a consistent temperature throughout your home. We’ll also explore how to avoid the devastating effects of water damage from burst pipes, and discuss how frozen pipes can contribute to mold growth, further complicating repairs and home restoration. With winter right around the corner, now is the time to take action and ensure your home is prepared to withstand the cold. By following these tips, you can save yourself from potential headaches and expenses—and keep your home safe and dry all season long.

Tips for Insulating Pipes

One of the most effective ways to prevent your pipes from freezing during the colder months is proper insulation. When temperatures plummet, exposed or poorly insulated pipes are at risk of freezing, which can lead to a burst pipe and costly water damage. Insulating your pipes helps maintain a stable water temperature, even in unheated or minimally heated areas of your home. Here are some practical tips for insulating your pipes and reducing the chances of a winter disaster:

1. Use Foam Pipe Insulation

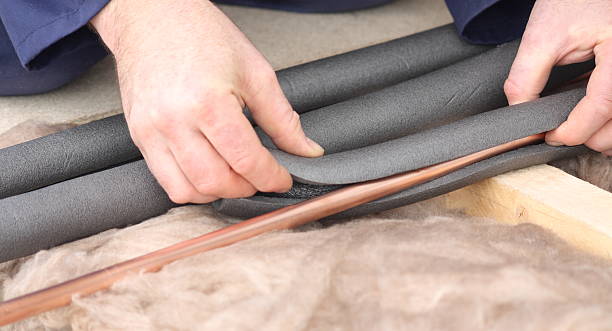
One of the easiest and most affordable ways to protect your pipes is by wrapping them in foam insulation. Foam pipe sleeves are readily available at hardware stores and come in a variety of sizes to fit most pipe diameters. These sleeves offer great thermal resistance, keeping the pipes insulated from the cold. For extra protection, you can use insulated tape or wrap, which adds an additional layer of defense against freezing temperatures.

2. Install Heating Cables or Tape

If you live in an area that experiences extreme cold, you might want to invest in electric heating cables or heat tape. These products are designed to be wrapped around pipes and plugged into an electrical outlet, providing a constant low-level heat to prevent freezing. Heating cables are especially useful for pipes that are particularly vulnerable, such as those in unheated attics, crawl spaces, or basements.

3. Insulate Attics, Basements, and Crawl Spaces

Pipes that run through attics, basements, and crawl spaces are more prone to freezing because these areas often lack the consistent temperature control of the rest of the house. Adding extra insulation to these spaces can make a big difference. Insulating the walls or floors of these areas with fiberglass or foam board insulation helps prevent cold air from seeping in and affecting the temperature of your pipes.

4. Seal Gaps and Cracks Around Pipes

Even if your pipes are well insulated, gaps and cracks in the walls, floors, or around windows can allow cold air to seep in, creating a draft that can freeze the pipes. Be sure to seal any openings around pipes with caulk or expanding foam. Pay particular attention to areas where pipes enter or exit your home, such as at exterior walls or near vents.

5. Use Pipe Insulation for Exterior Faucets

Outdoor faucets are especially vulnerable during the winter months. If possible, disconnect hoses and store them for the season. Then, insulate the outdoor faucet with a foam cover or insulation blanket to prevent freezing. For added protection, you can install an interior shut-off valve to stop the flow of water to outdoor pipes, which can prevent water from sitting in the pipe and freezing.

By taking these simple steps to insulate your pipes, you can significantly reduce the risk of frozen pipes and the water damage they can cause. However, insulation alone might not be enough to keep your pipes from freezing in extreme cold. Keep reading for more strategies to ensure that your home stays safe from the threat of frozen pipes during the winter.

Home Thermostat Preventing Frozen Pipes

Keeping a Consistent Temperature in the Home

One of the simplest but most effective ways to prevent your pipes from freezing is to maintain a consistent temperature inside your home, especially during the cold winter months. While insulating your pipes helps protect them from extreme temperatures, keeping the overall temperature in your house stable can further reduce the risk of frozen pipes. Here’s how to ensure your home stays warm enough to protect your plumbing:

1. Keep the Thermostat Set to the Same Temperature

Many homeowners make the mistake of lowering the thermostat at night or when they’re away, thinking they’ll save energy. However, even a slight drop in temperature can put your pipes at risk—particularly in rooms that are unheated or have poor insulation. It’s a good rule of thumb to keep your thermostat set to a consistent temperature, ideally no lower than 55°F (13°C), even when you’re not at home. This ensures that areas where pipes are located remain above freezing and helps prevent pipes from experiencing sudden temperature fluctuations that could lead to freezing.

2. Use Space Heaters in Vulnerable Areas

Certain areas of your home, like basements, crawl spaces, or attics, may be more prone to cold air, leaving pipes vulnerable to freezing. If you have pipes running through these areas, it’s a good idea to use space heaters to keep the temperature steady. Just be sure to place the heater in a safe location, away from flammable materials, and never leave it unattended.

3. Open Cabinet Doors in Kitchens and Bathrooms

Pipes running through cabinets, especially in exterior walls, can freeze if the temperature drops enough. To prevent this, open the cabinet doors in your kitchen and bathrooms during cold weather. This allows warm air from your home to circulate around the pipes, keeping them warmer. This is particularly important at night when temperatures tend to dip the lowest.

4. Consider Installing a Smart Thermostat

A smart thermostat offers homeowners greater control over the temperature of their home. With a smart thermostat, you can set schedules for heating, monitor your home’s temperature remotely, and receive alerts if the temperature drops below a certain threshold. This can be particularly useful for homeowners who travel during the winter or want to ensure their home stays heated while they’re at work. A smart thermostat can also help you reduce energy costs by adjusting the temperature when you’re not home, without putting your pipes at risk.

5. Seal Windows and Doors to Retain Heat

While you’re focused on keeping your home warm, don’t forget about drafts and air leaks. If cold air is leaking in through windows or doors, it can cause temperature fluctuations that may affect the pipes near exterior walls. Make sure to seal any gaps around windows, doors, or vents with weatherstripping or caulk. Adding heavy curtains or blinds over windows can also help retain heat, especially at night when outdoor temperatures are at their lowest.

By keeping a consistent temperature in your home and addressing potential areas of cold air infiltration, you can provide your pipes with the warmth they need to avoid freezing. However, even with the best efforts to maintain indoor warmth, pipes in particularly vulnerable areas may still face risks. The next section will focus on additional steps you can take to prevent costly water damage caused by burst pipes in winter.

Preventing Frozen Pipes with insulation

Methods to Prevent Costly Water Damage
from Burst Pipes in Winter

Frozen pipes are a major concern for homeowners, but the real danger comes when these pipes burst due to the pressure of expanding ice. When a pipe bursts, the water inside is suddenly released, which can quickly flood your home, causing significant water damage. The cost of repairs can be astronomical—repairing damaged plumbing, restoring water-damaged walls and flooring, and addressing potential structural issues are all costly undertakings. Fortunately, there are several ways you can prevent burst pipes and the water damage they bring.

1. Know the Vulnerable Areas in Your Home

Not all pipes are at equal risk of freezing. Pipes located in areas with limited heat circulation are more likely to freeze and burst. These areas typically include exterior walls, attics, basements, crawl spaces, and garages. Make a note of where your pipes run and pay special attention to areas that are not heated or that experience significant temperature fluctuations. Identifying these at-risk areas early on can help you take preventative measures before the cold sets in.

2. Turn Off Water Supply to Outdoor Faucets

Outdoor faucets and sprinkler systems are particularly vulnerable during the winter months. Any water left in these pipes is prone to freezing and expanding, leading to ruptured pipes and potentially severe water damage. To prevent this, be sure to shut off the water supply to outdoor faucets and drain any remaining water from the pipes. You can also purchase insulated faucet covers to add an extra layer of protection. For sprinkler systems, consider hiring a professional to blow out the system and remove water before winter arrives.

3. Keep Water Flowing During Extreme Cold

If you know a cold snap is on the way, you can take a simple precaution to reduce the risk of frozen pipes: let your faucets drip. Allowing a small stream of water to flow through the pipes keeps water moving, which makes it less likely to freeze. This method works best for pipes in areas that are prone to freezing, such as in exterior walls or uninsulated spaces. Even a trickle of water can prevent a buildup of pressure that could lead to a burst pipe.

4. Use Pipe Insulation and Heating Elements
in Critical Areas

As mentioned in earlier sections, insulating pipes in areas like basements, attics, and crawl spaces is crucial to preventing freezing. In especially cold climates, you may want to consider using pipe heating cables or heat tape in these critical areas. These devices are designed to keep water flowing and maintain a steady temperature in vulnerable pipes, even when the outside temperatures dip well below freezing.

5. Install an Automatic Shut-Off Valve

For added protection, consider installing an automatic shut-off valve in your home. This smart technology can sense when a pipe is at risk of bursting due to freezing or excessive pressure, and it will automatically shut off the water supply to prevent a flood. While these systems can be expensive to install, they provide peace of mind knowing that if a pipe were to freeze and burst, the damage would be minimized. If you’re in an area with particularly harsh winters, an automatic shut-off valve may be a worthwhile investment.

6. Monitor the Temperature in Your Home

In addition to keeping your thermostat at a steady temperature, it’s a good idea to monitor the temperature in rooms that are more susceptible to freezing. Many home improvement stores sell temperature monitors that allow you to track the temperature in specific areas of your home, such as the basement or attic. By keeping an eye on these temperatures, you can take action before pipes freeze and burst, such as turning up the heat or using space heaters to raise the temperature in vulnerable areas.

By taking proactive steps to prevent frozen pipes, you can greatly reduce the risk of costly water damage. However, even with all the preventive measures in place, it’s still important to be aware of the potential for mold growth after a pipe bursts. Mold thrives in damp environments, and water damage from a burst pipe can create the perfect breeding ground. In the next section, we’ll discuss the relationship between frozen pipes and mold, and how you can prevent mold from spreading in your home after a burst pipe.

Microbial Remediation Before Service

Mold from Frozen Pipes: How to Prevent
and Address It

When pipes freeze and burst, the immediate concern is often the flooding and water damage, but one of the longer-term dangers is the potential for mold growth. Mold thrives in damp environments, and water damage from burst pipes creates the ideal conditions for mold to take hold. If left unchecked, mold can spread rapidly, leading to health issues, unpleasant odors, and even more expensive repairs. This makes it essential to act quickly and address any water damage caused by frozen pipes to prevent mold from setting in.

1. Act Quickly to Dry Out Wet Areas

The most important thing you can do to prevent mold growth is to remove moisture as quickly as possible. If you have experienced a burst pipe, it’s crucial to dry out the affected area within 24 to 48 hours to prevent mold spores from taking root. Start by shutting off the water supply and cleaning up any standing water with a wet/dry vacuum or towels. Open windows to improve air circulation, and use fans and dehumidifiers to help speed up the drying process. The faster you can dry out the affected area, the less likely mold will have a chance to develop.

2. Inspect Hidden Areas for Moisture

Mold can grow in hidden places, such as behind walls, under floors, or in insulation. When water seeps into these areas after a burst pipe, it can remain trapped and create a perfect environment for mold. If the water damage is extensive, it may be necessary to remove drywall, baseboards, or flooring to inspect for moisture and mold growth. If you’re unsure whether an area is dry, consider using a moisture meter to check the levels in walls or floors. This will help you catch hidden moisture before mold can take hold.

3. Clean and Disinfect Affected Areas

Once you’ve dried the affected areas, it’s important to clean and disinfect surfaces that may have come into contact with water. Mold spores can begin to grow even on dry surfaces if they’re exposed to moisture for long enough, so thorough cleaning is essential. Use a mixture of water and detergent to scrub any hard surfaces, and consider using a mold-killing solution like vinegar or hydrogen peroxide to disinfect the area. For porous materials like carpets, upholstery, or insulation that have absorbed water, it may be necessary to replace them to prevent mold from taking hold.

4. Prevent Future Mold Growth with Proper Ventilation

After drying and cleaning the area, improving ventilation can help prevent future mold issues. Use fans and dehumidifiers to reduce moisture levels in areas like basements, crawl spaces, and bathrooms, where mold is most likely to develop. Keeping humidity levels in your home between 30 and 50 percent can help inhibit mold growth. You might also want to consider installing exhaust fans in areas prone to moisture buildup, such as kitchens and bathrooms.

5. Regularly Inspect for Mold and Moisture Issues

Even after addressing the immediate aftermath of a burst pipe, it’s important to keep a regular eye out for signs of mold. Mold can grow slowly and may not be immediately visible, so regular inspections of areas affected by water damage are key. Pay particular attention to hidden or poorly ventilated areas like basements, attics, and behind walls. If you spot any signs of mold, such as a musty smell or discoloration on walls or ceilings, it’s crucial to take immediate action to mitigate the spread before it becomes a bigger problem.

6. Consider Professional Mold Remediation

If you’ve experienced significant water damage or mold growth that you can’t control on your own, it may be worth hiring a professional mold remediation company. Mold specialists have the expertise and equipment to properly assess the damage, remove mold, and restore the affected areas to a safe condition. They can also help identify the source of moisture and advise on how to prevent future mold growth.

By addressing water damage from burst pipes quickly and taking steps to prevent mold, you can avoid some of the most serious long-term consequences of frozen pipes. Preventing mold isn’t just about protecting your home from structural damage; it’s also about safeguarding the health of your family. Mold can cause allergic reactions, respiratory issues, and other health problems, so prompt action is essential.

Final Thoughts

Frozen pipes are a serious concern for homeowners, but with a little preparation and attention, they can be easily prevented. From properly insulating your pipes to maintaining a consistent indoor temperature, there are several strategies you can use to reduce the risk of frozen pipes and avoid the costly damage they can cause. Additionally, addressing water damage quickly and preventing mold growth is just as important for protecting your home and your health.

As winter approaches, take the time now to prepare your home for the cold. By following the tips in this guide, you’ll be able to prevent frozen pipes, mitigate water damage, and keep your home safe from the mold that often follows in the wake of a burst pipe. Don’t wait until the first freeze—now is the perfect time to safeguard your home and avoid the headache of costly repairs and mold removal down the road.

For expert water damage restoration services that prioritize your satisfaction and peace of mind, trust Harrison’s Cleanup & Restoration. Contact us today if you’re experiencing any of the issues we mentioned. We have the remedies tailored for your needs.
How To Manage Moisture With High Humidity Levels to Prevent Mold Growth

How To Manage Moisture With High Humidity Levels to Prevent Mold Growth

Manage Moisture with High Humidity Levels

How To Manage Moisture With High Humidity Levels To Prevent Mold Growth

Imagine stepping into your basement on a warm summer afternoon, expecting to find a cool retreat from the day’s heat. Instead, you’re met with a musty, damp smell that instantly sets off alarm bells. For many homeowners in southeastern Wisconsin, this scenario is all too familiar. The region’s naturally high humidity levels, especially during the warmer months, create a perfect breeding ground for mold—an unwelcome guest that can quickly turn a comfortable home into a health hazard.

Whether you’re a first-time homeowner in Washington County or a seasoned property owner in Ozaukee County, understanding how to manage moisture in your home is essential to preventing mold growth. Mold isn’t just an eyesore; it can cause serious structural damage to your home and pose significant health risks to you and your family. But before mold becomes a problem, there’s a common culprit that needs to be addressed: humidity.
In this article, we’ll explore how high humidity levels contribute to mold growth and provide you with practical tips to manage moisture effectively. By the end, you’ll have the knowledge and tools needed to keep your home safe, dry, and mold-free, no matter the season.

Understanding Humidity and Its Role In Mold Growth

Humidity—it’s a word we hear often, especially when the weather turns warm and sticky. But what exactly is humidity, and why does it play such a crucial role in mold growth? Let’s break it down.

The Basics of Humidity

Humidity is essentially the amount of moisture in the air. When we talk about “relative humidity” (RH), we’re referring to the percentage of moisture the air holds relative to the maximum it can hold at a given temperature. In simpler terms, the higher the relative humidity, the closer the air is to being saturated with moisture.
Now, consider your home on a typical August day in Mequon, Wisconsin. Outside, the sun is blazing, and the humidity is high. As that humid air seeps into your home—whether through open windows, doors, or even tiny cracks in the foundation—it brings moisture with it. If the RH inside your home climbs above 60%, you’re entering dangerous territory for mold growth.

Why High Humidity Promotes Mold Growth

Mold is a bit like an uninvited guest at a party. It thrives in conditions that we often try to avoid. For mold spores, high humidity is the equivalent of an all-you-can-eat buffet. When the RH in your home stays above 60%, the moisture in the air begins to settle on surfaces like walls, ceilings, and floors. This creates a damp environment where mold can easily take root and start to grow.

Think of mold as a weed in your garden. Just as weeds need water to thrive, mold needs moisture. In southeastern Wisconsin, where summer humidity can be relentless, it’s like giving mold a never-ending supply of water. And once mold begins to grow, it spreads quickly, damaging your home and potentially harming your health.

The Wisconsin Connection

Why is this particularly relevant for homeowners in Washington, Ozaukee, and Sheboygan counties? The answer lies in the unique climate of southeastern Wisconsin. Proximity to Lake Michigan means that these areas often experience higher humidity levels, especially during the summer months. This makes homes in the region more susceptible to the problems associated with high humidity and, by extension, mold.

A Local Example

Take, for instance, the case of a homeowner in Sheboygan County who noticed a persistent musty odor in their home every summer. Despite regular cleaning, the smell returned year after year. It wasn’t until a professional inspection revealed that the high humidity levels in their basement were causing hidden mold growth behind the walls. By the time the problem was discovered, the mold had spread extensively, requiring significant remediation work.
This is why it’s crucial to understand how humidity affects your home and to take proactive steps to manage it before it leads to mold growth. In the next sections, we’ll delve deeper into how you can identify high humidity areas in your home and the practical steps you can take to keep moisture under control.
Manage Moisture with High Humidity to Prevent Mold in Basement

Identifying High Humidity Areas in Your Home

While it’s easy to overlook, the humidity levels inside your home can vary from room to room, and certain areas are particularly prone to moisture buildup. Identifying these high humidity zones is the first step in preventing mold growth. Imagine your home as a fortress; you wouldn’t want any weak spots where invaders could slip through unnoticed. In the same way, you need to be vigilant about those areas in your home where humidity tends to gather and create a welcoming environment for mold.

Common Problem Areas

Start by considering the usual suspects—rooms like basements, attics, bathrooms, kitchens, and crawl spaces. Each of these areas has its own set of challenges when it comes to humidity.

  • Basements – Basements are notorious for being damp, especially during the summer months. The cool, underground space naturally collects moisture, and without proper ventilation, it can become a mold haven. I recall working with a homeowner in Washington County who had always loved the coolness of their basement in the summer, using it as a retreat from the heat. But over time, that coolness came at a cost. The damp air led to mold growth along the walls, which remained hidden until the unmistakable odor gave it away.
  • Attics – At the opposite end of the house, attics can also be problem areas. During the summer, the heat rises, and if your attic isn’t properly ventilated, it can trap moisture from the air below. The trapped moisture, combined with the heat, creates a perfect storm for mold growth. Imagine your attic as a forgotten storage room—out of sight, out of mind—until one day, you decide to retrieve a box of holiday decorations and discover that mold has taken over.
  • Bathrooms and Kitchens – Bathrooms and kitchens are naturally humid due to the constant use of water. Every hot shower or boiling pot of water releases steam, which, if not properly ventilated, can linger in the air and settle on surfaces. I often advise homeowners to think of these rooms as the lungs of the house—they need to breathe. Without good ventilation, they can quickly become overwhelmed by moisture.
  • Crawl Spaces – Crawl spaces, often neglected, are another common area where humidity can accumulate. Because they’re close to the ground, they can absorb moisture from the soil, especially after heavy rains. A client in Ozaukee County once shared how they had completely forgotten about their crawl space until a routine inspection revealed mold growing on the wooden beams. It’s a small, often hidden space, but it can cause big problems if left unchecked.

How to Measure Humidity Levels

Once you’ve identified potential problem areas, the next step is to measure the humidity levels. This might sound technical, but with a simple tool like a hygrometer, you can easily check the relative humidity in each room. A hygrometer is like a thermometer for moisture; it tells you how much moisture is in the air.
Picture this: You’ve just finished installing a new hygrometer in your basement. You check it a few hours later, and the display reads 65%—well above the safe range. That little device just gave you a crucial piece of information. It’s telling you that the environment in your basement is ripe for mold growth, giving you the opportunity to take action before it becomes a bigger issue.

Signs of Excessive Moisture

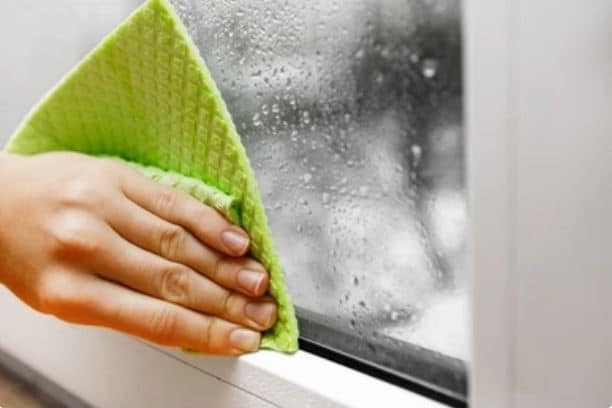
Beyond using tools, your senses can also help you detect high humidity. Pay attention to signs like condensation on windows, damp spots on walls or ceilings, musty odors, and of course, any visible mold. I once encountered a homeowner in Sheboygan County who had been living with what they thought was a minor issue—occasional condensation on the basement windows. They assumed it was harmless, but over time, that condensation led to significant mold growth hidden behind the walls.
Think of these signs as the warning lights on your car’s dashboard. They may seem minor at first, but they’re telling you that something needs attention. The sooner you address them, the less likely you are to face bigger, more expensive problems down the road.

A Local Example

Consider the story of a family in Washington County who noticed a persistent musty smell in their home every summer. They lived near a wooded area where humidity levels were naturally high, and despite their efforts to keep the windows open for ventilation, the smell persisted. It wasn’t until they used a hygrometer to check the humidity levels in their basement that they discovered the problem. The RH was consistently above 70%, and upon further inspection, they found mold growing behind their drywall. This discovery prompted them to take immediate action, installing a dehumidifier and improving the basement’s ventilation.

How To Use A Hygrometer In Your Home

To make this process easier for you, here is a knowledgeable expert walking you through ‘how to use a hygrometer in your home’ explaining what the readings mean and what steps to take if they’re too high.

Practical Tips for Managing Humidity Levels

Now that you’ve identified the areas in your home where humidity tends to accumulate, the next step is to take action. Managing humidity levels doesn’t have to be a daunting task; with a few practical tips, you can create an environment that’s less inviting for mold. Think of it as fortifying your home’s defenses. Simple measures can go a long way in keeping moisture under control and mold at bay.

Using Dehumidifiers

One of the most effective tools for controlling humidity is a dehumidifier. These devices work by pulling moisture from the air, lowering the relative humidity, and creating a drier environment that’s less conducive to mold growth.

Picture a homeowner in Ozaukee County who had struggled for years with a damp basement. Every summer, the humidity would rise, and they’d notice that unmistakable musty odor creeping in. They tried everything—opening windows, running fans—but nothing seemed to keep the moisture at bay. Then, after consulting with a local expert, they decided to invest in a dehumidifier. The difference was immediate and noticeable. Within days, the air felt fresher, the musty smell was gone, and they could finally use their basement without worry.

When choosing a dehumidifier, consider the size of the area you need to cover. A small, portable unit might work for a single room, but larger spaces like basements often require more powerful, high-capacity units. It’s also important to regularly empty the water reservoir or, if possible, connect the unit to a drain for continuous operation.

Ensuring Proper Ventilation

Ventilation is another key factor in managing humidity. Think of your home as a living, breathing entity. It needs good airflow to stay healthy. Without proper ventilation, moisture can build up, leading to the same problems we’ve discussed.

Consider the story of a Washington County family who renovated their bathroom, replacing the old, noisy exhaust fan with a modern, quiet model. At first, they rarely used the new fan, thinking it wasn’t necessary unless the mirror fogged up after a shower. But as time passed, they began to notice small patches of mold appearing in the corners of the ceiling. After some research, they realized that the lack of ventilation had allowed moisture to accumulate, creating the perfect conditions for mold growth. They started running the fan every time they used the bathroom, and the mold stopped spreading.

For bathrooms and kitchens, make sure to use exhaust fans during and after activities that produce moisture, such as cooking or showering. In other areas of your home, consider using ceiling fans or opening windows to promote airflow. For those who live in homes with attics, proper ventilation is critical to prevent moisture buildup, especially in the summer when hot air rises and gets trapped.

Regular Maintenance

Maintaining your home is another crucial step in managing humidity. Leaky pipes, cracked foundations, and unsealed windows and doors are all potential sources of moisture. Routine maintenance can help you catch these issues before they lead to bigger problems.
I remember working with a homeowner in Ozaukee County who had a beautifully landscaped yard with an intricate irrigation system. However, they started noticing damp spots on the basement walls, which didn’t make sense given the dry weather. Upon investigation, we discovered that the irrigation system had been leaking underground, saturating the soil around the foundation and causing water to seep into the basement. By fixing the leak and sealing the basement walls, they were able to stop the moisture intrusion and prevent mold growth.
Regularly check your home for leaks, both inside and out. Inspect gutters and downspouts to ensure they’re directing water away from your home, and make sure your home’s exterior is properly sealed. These small steps can make a big difference in keeping your home dry.

HVAC Systems and Humidity Control

Your home’s HVAC (Heating, Ventilation, and Air Conditioning) system plays a crucial role in managing humidity. Not only does it regulate the temperature, but it also helps control the moisture levels in the air.
A homeowner in Sheboygan County once shared their experience with me. They had an older HVAC system that wasn’t equipped to handle the high humidity levels common in the area during the summer. As a result, their home often felt clammy, even when the air conditioning was running. After consulting with an HVAC professional, they upgraded to a more efficient system with a built-in dehumidification feature. The difference was night and day—the air felt crisp and comfortable, and they no longer had issues with humidity-related mold.
To optimize your HVAC system, make sure it’s properly maintained. Change the filters regularly, and have the system serviced annually to ensure it’s functioning efficiently. If you’re experiencing persistent humidity issues, consider upgrading to a system that includes humidity control features.

Indoor Plants and Moisture Control

Interestingly, certain indoor plants can help absorb moisture and reduce humidity levels in your home. Think of these plants as natural air purifiers that also happen to help with moisture control.
One of my clients in Washington County, who had struggled with humidity in their sunroom, found success by introducing a few moisture-absorbing plants. They placed plants like Boston ferns and peace lilies in the corners of the room, where moisture tended to collect. Not only did these plants thrive in the humid environment, but they also helped keep the humidity levels in check, reducing the need for mechanical dehumidifiers.
While plants alone won’t solve major humidity issues, they can be a helpful addition to your overall moisture management strategy. Plus, they add a touch of greenery and life to your home, making it a more pleasant place to be.

A Local Example

In Washington County, a couple had been dealing with a persistent mold issue in their basement despite their best efforts. They had installed a dehumidifier, but it wasn’t enough. After consulting with a professional, they learned that their home’s poor ventilation was the root cause of the problem. By upgrading their HVAC system and improving the ventilation in their basement, they were able to bring the humidity levels under control. Today, their basement is mold-free, and they can finally use the space without concern.
Best Dehumidifiers

Check out some of the best dehumidifiers on the market vetted by Forbes. See list +

Seasonal Considerations and How to Adapt

As a homeowner in southeastern Wisconsin, you’re no stranger to the changing seasons. The region’s weather can swing from hot and humid summers to cold, dry winters, and each season brings its own set of challenges when it comes to managing humidity levels in your home. Understanding these seasonal variations is crucial for keeping moisture—and mold—under control year-round.

Battling the Summer Heat and Humidity

Summers in Ozaukee, Washington, and Sheboygan Counties can be hot and sticky, with high humidity levels making the air feel even heavier. During these months, managing humidity is a top priority. Imagine your home as a sponge, soaking up the moisture from the hot, humid air outside. If left unchecked, that moisture can seep into every corner, creating the perfect environment for mold to thrive.

I remember a homeowner in Ozaukee County who experienced this firsthand. Every summer, their home would become unbearably humid, especially in the basement, where the cool air would cause condensation to form on the walls. They tried everything—running fans, opening windows at night—but nothing seemed to help. Finally, they invested in a whole-house dehumidifier. The difference was remarkable. The air became lighter, the musty smell disappeared, and they could finally enjoy their basement again without worrying about mold.
To combat summer humidity, it’s essential to use dehumidifiers and ensure your home is well-ventilated. Keep windows and doors closed during the day when humidity is at its peak, and run your air conditioning, which also helps to remove moisture from the air. Regularly check areas prone to moisture, such as basements and bathrooms, and address any signs of dampness immediately.

Preparing for Fall with the Cold Months Ahead

As the weather begins to cool, the humidity levels typically drop. However, fall is a critical time to prepare your home for the winter months ahead. Picture it as laying the groundwork—taking steps now to ensure your home stays dry and mold-free when the temperatures plummet.
A client in Washington County shared their experience of a particularly wet fall season. They noticed that their gutters were overflowing during heavy rains, causing water to pool around the foundation of their home. Concerned about potential water damage and mold growth, they took action by cleaning out the gutters and extending the downspouts to direct water away from the house. This simple task not only protected their foundation but also prevented moisture from seeping into their basement during the colder months.
During the fall, make sure your home is ready for winter by cleaning gutters, sealing any cracks in the foundation, and checking your home’s insulation. Proper insulation not only keeps your home warm but also helps prevent condensation from forming on cold surfaces, which can lead to mold growth. Fall is also a good time to inspect your home’s HVAC system and change the filters before the heating season begins.

Keeping Humidity in Check Without Over-Drying
in Winter

Winter in southeastern Wisconsin brings cold temperatures and, often, dry air. While low humidity might seem like a blessing after a humid summer, it can actually cause problems if it leads to over-drying. Imagine your home as a delicate balance—too much moisture can lead to mold, but too little can cause dry skin, respiratory issues, and even damage to wooden furniture and floors.
One homeowner in Sheboygan County recounted how they initially welcomed the dry winter air after a particularly humid summer. However, they soon noticed that their hardwood floors were beginning to crack, and their skin was constantly dry and itchy. After consulting with a professional, they learned that their home’s humidity levels had dropped too low. They installed a humidifier to add moisture back into the air, finding the perfect balance that kept their home comfortable without creating conditions conducive to mold.

To maintain a healthy humidity level during the winter, consider using a humidifier, but be cautious not to over-humidify. The ideal indoor humidity level in winter is around 30-40%. Also, make sure to monitor areas where condensation might form, such as windows and exterior walls. If you notice condensation, it’s a sign that the humidity is too high, and you should reduce it to prevent mold growth.

Managing the Melt in Spring and Preparing for Heat

Spring in Wisconsin can be unpredictable, with temperatures fluctuating and snow melting, leading to an influx of moisture. Think of spring as a transition period—your home is emerging from the cold, dry winter, and you need to prepare it for the warmer, more humid months ahead.
A homeowner in Washington County once described the challenges they faced during a particularly wet spring. As the snow melted, they noticed water seeping into their basement, causing concern about potential mold growth. They quickly installed a sump pump and sealed any cracks in the foundation, effectively managing the water intrusion and preventing moisture from accumulating in their home.
In spring, it’s important to inspect your home for any damage caused by winter weather. Check the roof for leaks, the foundation for cracks, and ensure that your gutters and downspouts are clear and functioning properly. As the temperatures rise, start using dehumidifiers in areas prone to moisture, and ensure that your home is well-ventilated to prepare for the summer months.

A Local Example

You won’t hear stories about your neighbors mold infestations, but we do. They relate to many other local homeowners who struggle with seasonal humidity changes in their older homes. Each season brings a new challenge—summers are humid, winters are dry, and spring brings concerns about water intrusion. By taking a proactive approach and addressing each season’s specific humidity challenges, many are able to maintain a comfortable, mold-free home year-round.

Managing Moisture with High Humidity Levels and Seasonal Home Maintenance

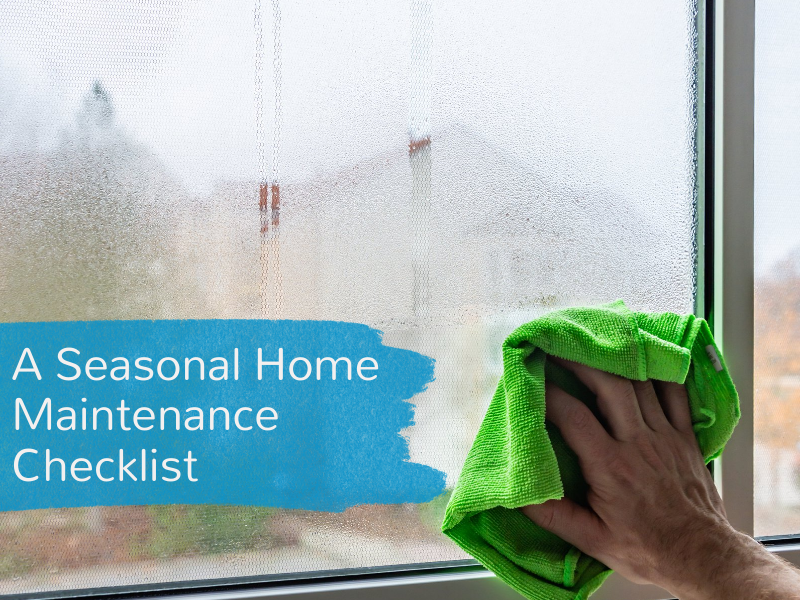
Courtesy of Quality Seamless Gutters. See if you have checked everything off the list so far this year. See list +

Have You Learned Something Today?

Managing humidity is more than just keeping your home comfortable—it’s a critical step in protecting your property and your health from the dangers of mold. We’ve explored how humidity impacts mold growth and how you can take control to prevent it from becoming a problem in your home.

Let’s Recap

1. Understanding the Link Between Humidity and Mold Mold thrives in environments where humidity levels are high. By recognizing the signs of high humidity, like condensation on windows or musty odors, you can take early action to prevent mold growth. The story of a homeowner who battled mold in their basement due to unchecked humidity serves as a reminder that vigilance is key.

2. Effective Use of Dehumidifiers and Ventilation Dehumidifiers and proper ventilation are your frontline defense against moisture buildup. Whether it’s using a dehumidifier in a damp basement or ensuring your bathroom is well-ventilated, these strategies can help you maintain ideal indoor humidity levels and keep mold at bay.
3. Identifying Problem Areas in Your Home Some areas of your home are more prone to moisture issues than others. Basements, crawl spaces, and bathrooms often harbor hidden moisture, which can lead to mold if not addressed. Regular inspections and prompt repairs of leaks or damp spots are essential to prevent mold from taking hold.
4. Seasonal Considerations and Adaptation Southeastern Wisconsin’s changing seasons bring different humidity challenges, from the humid summers to the dry winters. By preparing your home for each season—using dehumidifiers in summer, checking insulation in winter—you can manage moisture effectively year-round. Local examples show how adapting to seasonal changes can protect your home from mold.

The Importance of Prevention

Prevention is your best defense against mold. By managing humidity levels, you not only safeguard your home but also protect your family’s health and your peace of mind. Mold can cause serious health issues, particularly for those with allergies or respiratory conditions, and the cost of mold remediation can be substantial. By taking simple, proactive steps—like using dehumidifiers, inspecting your home for moisture, and choosing the right building materials. You can prevent mold before it becomes a serious problem.

However, even the most diligent homeowners can encounter mold issues. If you find yourself facing a persistent mold problem or if you’re unsure about how to manage humidity in your home, professional help is always available. A mold remediation expert can assess your situation, provide targeted solutions, and ensure that your home remains mold-free.

What You Can Do Right Now

This summer has been exceptionally humid, and now is the perfect time to start monitoring your home’s humidity levels. Regular checks and prompt action at the first sign of trouble can save you from the hassle and expense of dealing with mold later on. Consider purchasing a hygrometer to monitor humidity levels in your home and make it a habit to check areas prone to moisture, like basements and bathrooms, at least once a month.
Remember, protecting your home from mold is not just about avoiding a nuisance—it’s about preserving your health, your property, and your peace of mind. Don’t wait until it’s too late. Take action today, keep your humidity levels in check, and enjoy the comfort and safety of a mold-free home.

Friendly Reminder: Protect your home, your health, and your peace of mind by keeping humidity under control. Your home is your sanctuary, and with a little care, you can ensure it remains a safe and healthy place for you and your family. If you come across any noticeable odors, water leaks, or mold we recommend calling an indoor hygienist to determine if you have a microbial issue. If their report shows your property does have an issue, then give us a call at Harrison’s Cleanup & Restoration to set up an inspection to proceed with mold remediation.

Identifying and Dealing with Winter Mold in Your Home

Identifying and Dealing with Winter Mold in Your Home

Winter Water Damage and Mold Growth

Dealing with Winter Water Damage
and Mold Growth in Your Home

Winter brings a picturesque landscape of snow-covered surroundings and cozy moments by the fireplace. However, amidst this seasonal beauty lurks a silent and often overlooked threat – mold. As temperatures drop and homes seal up against the cold, the risk of water damage and subsequent mold growth increases. In this comprehensive guide, we’ll explore the hidden dangers of winter mold, how it relates to water damage, and effective strategies to identify and address this perilous issue.

Understand the Link Between Water Damage
and Mold:

Water damage is a common precursor to mold growth. During the winter, various factors contribute to this risk. Leaky roofs, poorly insulated walls, and foundation cracks can allow moisture to seep into the home. Add fluctuating temperatures and condensation on windows, and you have the perfect recipe for mold development. The key to mold prevention is understanding and addressing the underlying water damage issues.

Identifying Water Damage and Mold Warning Signs:

1. Musty Odors

Mold often produces a distinct musty smell. If you notice an unpleasant, earthy odor, it’s crucial to investigate the source.

2. Visible Water Stains

Stains on ceilings, walls, or floors may indicate water intrusion. Regularly inspect these areas for any discoloration or signs of dampness.

3. Peeling or Discoloration of Surfaces

Water damage can lead to paint or wallpaper peeling, and surfaces may develop dark or discolored patches.

4. Increased Allergy Symptoms

Mold spores can trigger allergies. If you or your family members experience an uptick in allergy symptoms during winter, mold could be the culprit.

Preventing Winter Mold Growth:

1. Proactive Inspection

Conduct regular home inspections, especially in vulnerable areas like basements, attics, and crawl spaces. Look for signs of water damage, and address issues promptly.

2. Proper Ventilation

Ensure proper ventilation in high-moisture areas such as bathrooms, kitchens, and laundry rooms. Consider using exhaust fans to reduce humidity levels.

3. Sealing Leaks

Seal any leaks in your roof, windows, doors, and foundation promptly. This will prevent water from entering your home and creating conditions conducive to mold growth.

4. Insulation

Adequate insulation helps regulate indoor temperatures and prevents condensation. Pay special attention to areas prone to cold drafts, as condensation can accumulate there.

Dealing with Winter Mold Remediation

1. Professional Assessment

If you suspect mold growth, consult with a professional mold remediation specialist to conduct a thorough assessment of your home.

2. Mold Removal

Remediation involves removing mold-infested materials, cleaning and disinfecting affected areas, and addressing the root cause of the problem to prevent recurrence.

3. Humidity Control

Invest in dehumidifiers to maintain optimal humidity levels in your home. This inhibits mold growth and promotes a healthier living environment.

Winter mold is a hidden threat that can compromise the safety and well-being of your home and family. By staying vigilant, identifying warning signs, and taking proactive measures to prevent water damage, you can effectively safeguard your home from the clutches of mold. Remember, early detection and swift action are the keys to a mold-free winter haven. Stay informed, stay vigilant, and enjoy the beauty of winter without compromising your home’s integrity.

For professional assistance with water damage restoration or to learn more about safeguarding your home, contact Harrison’s Cleanup & Restoration today. Our experienced team is dedicated to helping you protect your home from water damage and its associated challenges.